> ## Documentation Index
> Fetch the complete documentation index at: https://newwebsite.mintlify.site/llms.txt
> Use this file to discover all available pages before exploring further.
# CMS
> Content Management System for easy content updates
## Content Management System
Manage your website content with our built-in CMS. Create reusable content snippets, blog posts, and other text content that can be easily added to your website through the editor or chat interface.
 ## How to Create and Use Content
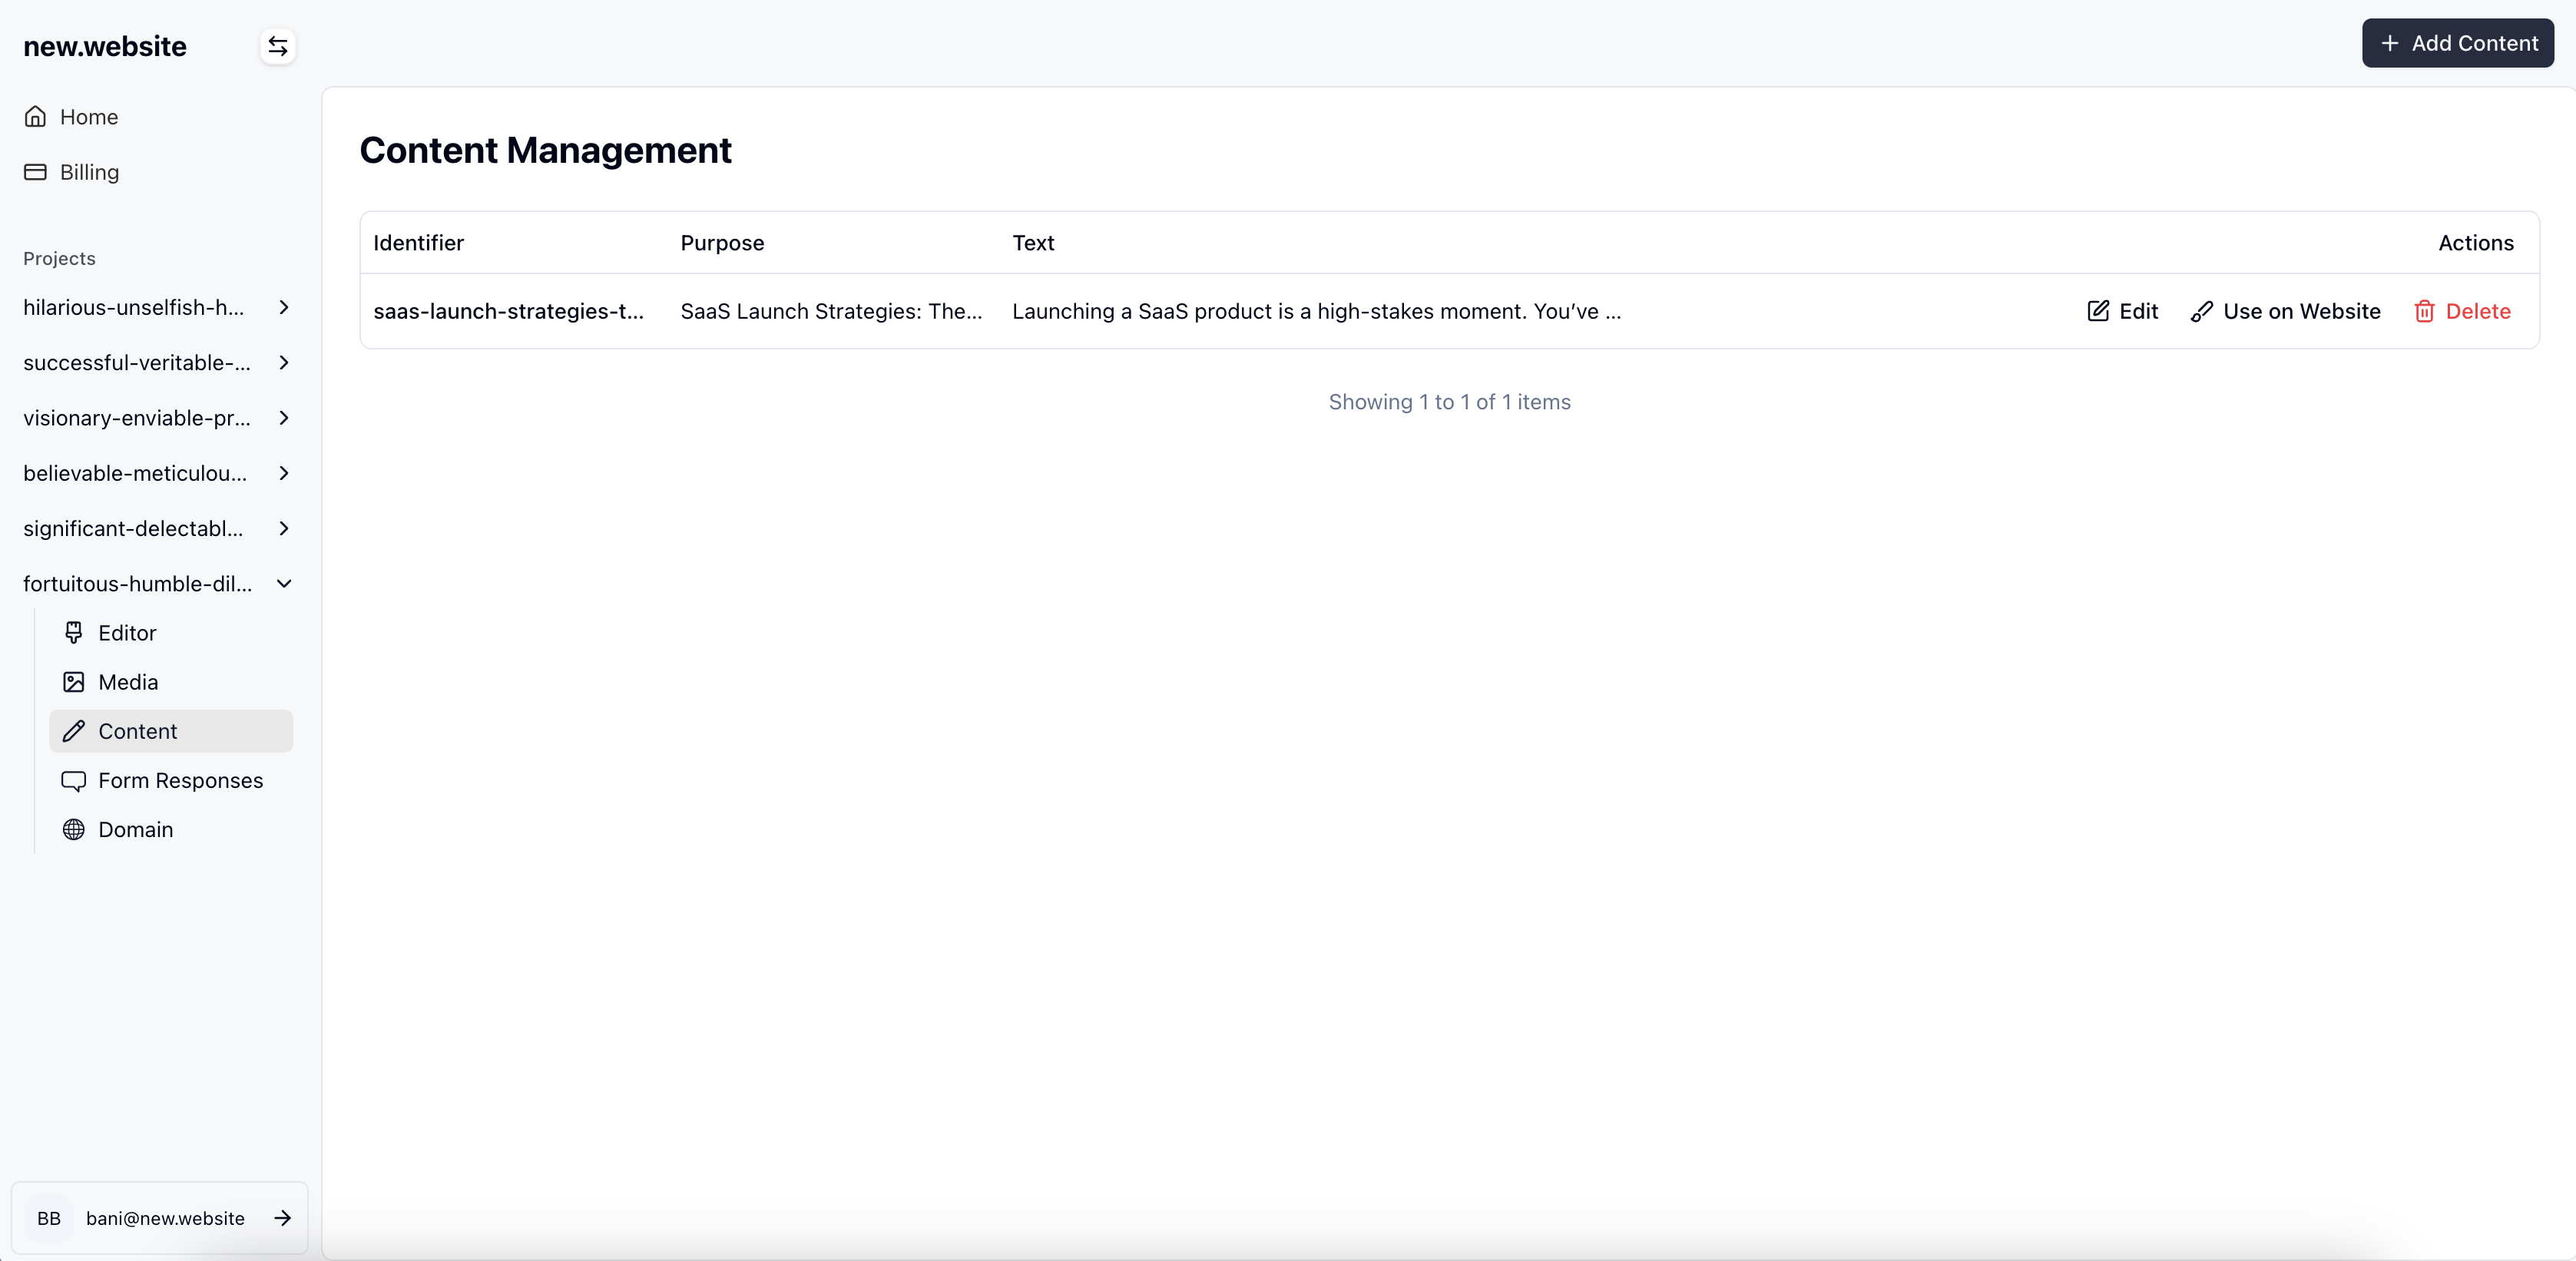
1. Go to your project in the new\.website dashboard
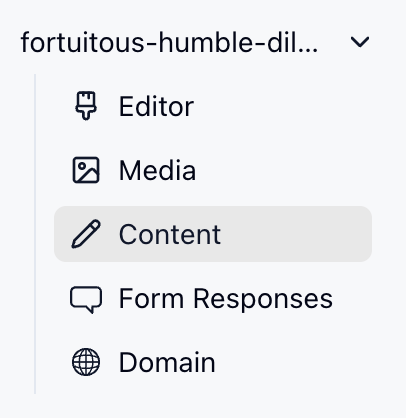
2. Click on the **Content** tab in the left sidebar
3. You'll see your content management interface where you can view, edit, and create content pieces
## How to Create and Use Content
1. Go to your project in the new\.website dashboard
2. Click on the **Content** tab in the left sidebar
3. You'll see your content management interface where you can view, edit, and create content pieces
 1. Click the **"+ Add Content"** button in the top right
2. This will open the content creation modal where you can add new blog posts, snippets, or other content pieces
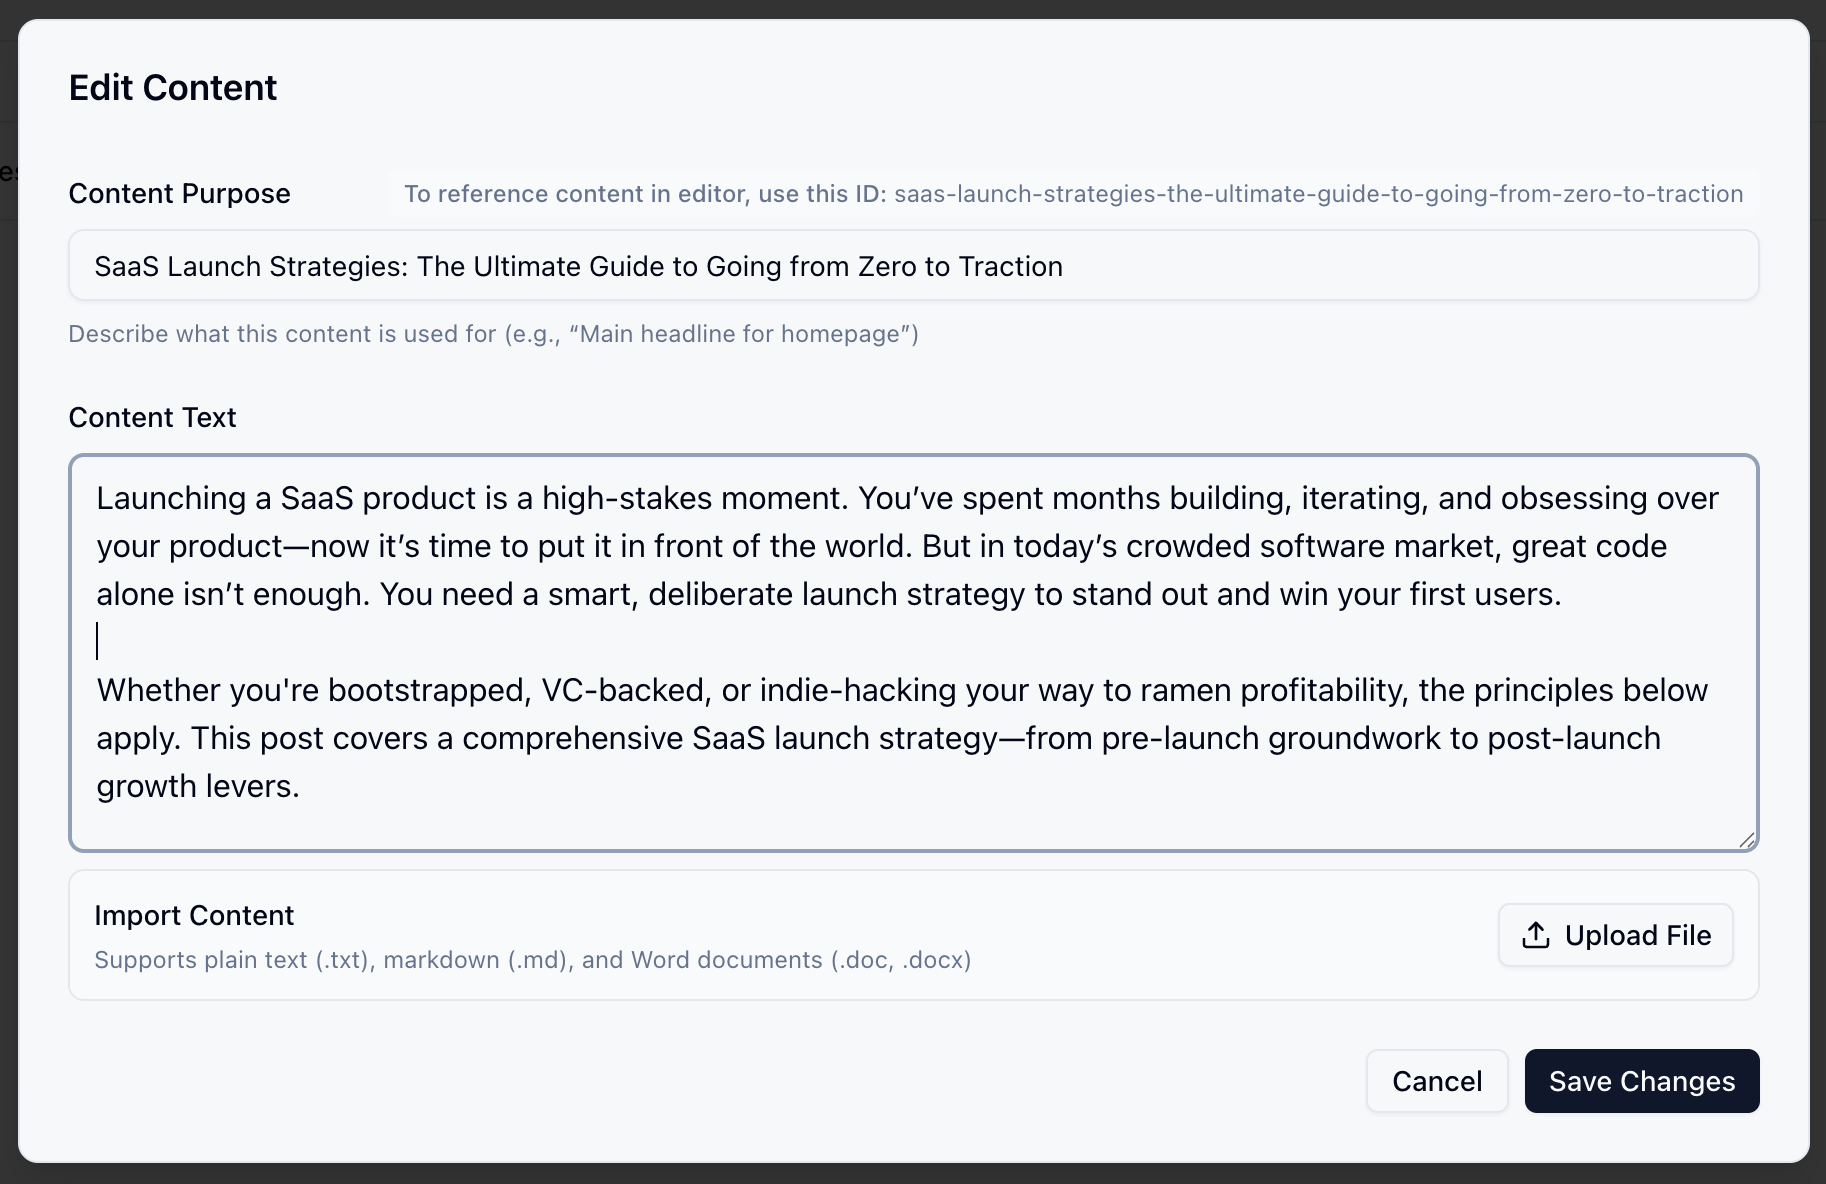
1. Fill in the content details in the modal that appears
2. Add a descriptive **Content Purpose** (this helps identify what the content is for)
3. Write your **Content Text** - this can be blog posts, product descriptions, snippets, or any other text content
4. You can also import content from files (supports .txt, .md, .doc, .docx formats)
5. Click **"Save Changes"** when you're done
1. Click the **"+ Add Content"** button in the top right
2. This will open the content creation modal where you can add new blog posts, snippets, or other content pieces
1. Fill in the content details in the modal that appears
2. Add a descriptive **Content Purpose** (this helps identify what the content is for)
3. Write your **Content Text** - this can be blog posts, product descriptions, snippets, or any other text content
4. You can also import content from files (supports .txt, .md, .doc, .docx formats)
5. Click **"Save Changes"** when you're done
 There are two ways to add your content to your website:
**Method 1: Using the Chat Interface**
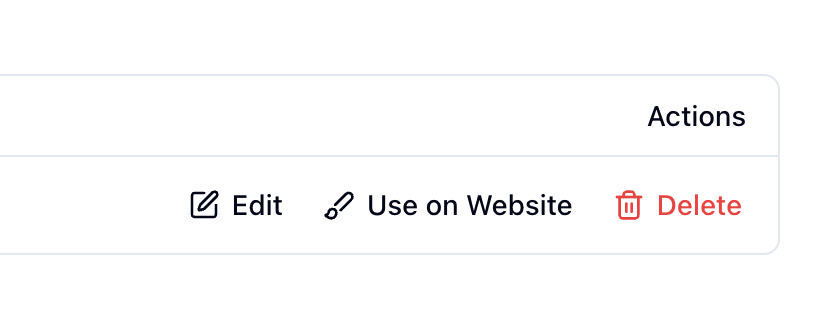
1. Click the **"Use on Website"** button next to any content piece
2. This will open a chat where you can tell our AI where and how to add the content
There are two ways to add your content to your website:
**Method 1: Using the Chat Interface**
1. Click the **"Use on Website"** button next to any content piece
2. This will open a chat where you can tell our AI where and how to add the content
 **Method 2: Using the Editor**
1. Go to your website editor
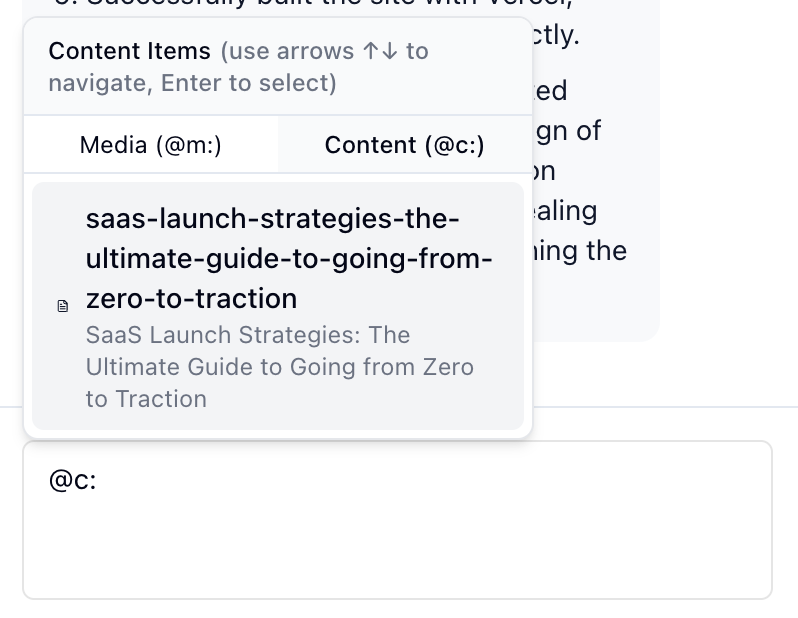
2. Type `@c:` to see a dropdown of all your content items
3. Click on the content piece you want to add
4. The content will be inserted at your cursor position
Use the `@c:` shortcut in the editor to quickly access and insert any of your content pieces while building your website.
**Method 2: Using the Editor**
1. Go to your website editor
2. Type `@c:` to see a dropdown of all your content items
3. Click on the content piece you want to add
4. The content will be inserted at your cursor position
Use the `@c:` shortcut in the editor to quickly access and insert any of your content pieces while building your website.
 1. Your content piece will now appear on your website
2. You can edit the content anytime from the Content tab
3. Changes to content pieces will automatically update wherever they're used on your website
## Content Features
### Reusable Content
* Create content once and use it multiple times across your website
* Update content in one place and see changes reflected everywhere it's used
* Perfect for common text snippets, product descriptions, or frequently updated information
### Content Types
* **Blog Posts**: Full articles and blog content
* **Snippets**: Short reusable text pieces
* **Product Descriptions**: Detailed product information
* **About Sections**: Company or personal information
* **Custom Content**: Any text content you need to manage
### Content Management
* **Edit Content**: Modify existing content pieces from the dashboard
* **Import Content**: Upload content from text files, markdown, or Word documents
* **Content IDs**: Each piece gets a unique ID for easy referencing
* **Content Organization**: Keep your content organized with clear purposes and naming
## Best Practices
Use clear, descriptive purposes for your content pieces so you can easily find and identify them later.
Group related content pieces with similar naming conventions to keep your CMS organized.
## Use Cases
### Blog Management
Create and manage blog posts that can be easily added to blog pages or featured sections of your website.
### Product Catalogs
Maintain detailed product descriptions that can be used across product pages, listings, and promotional content.
### Marketing Copy
Store marketing headlines, descriptions, and calls-to-action that can be reused across different pages.
### Legal Content
Manage terms of service, privacy policies, and other legal content that might be referenced in multiple places.
Content pieces are available on all new\.website plans. There are no limits on the number of content pieces you can create or the length of your content.
## Troubleshooting
### Content Not Appearing
* Make sure you've saved your content changes
* Check that you've properly added the content to your website using `@c:` or the "Use on Website" button
* Refresh your website to see the latest changes
### Can't Find Content
* Check the content purpose field to identify the right piece
* Review your content list in the dashboard
* Make sure you're looking in the correct project
### Content Not Updating
* Ensure you've saved changes to the content piece
* Check that the content is properly linked on your website
* Clear your browser cache to see the latest version
## Frequently Asked Questions
The CMS is included with all new\.website plans at no additional cost. There are no limits on the number of content pieces you can create or their length.
You can import content from several file formats including plain text (.txt), markdown (.md), and Word documents (.doc, .docx). This makes it easy to migrate existing content to your CMS.
Yes, you can edit any content piece from the Content dashboard. Changes will automatically update everywhere that content is used on your website.
If you delete a content piece that's currently used on your website, those sections will show as missing content. Make sure to remove or replace the content on your website before deleting it from the CMS.
Absolutely! That's one of the main benefits of the CMS. You can use the same content piece across multiple pages, and any updates will be reflected everywhere it's used.
Use descriptive Content Purpose fields and consistent naming conventions to keep your content organized. This will help you quickly identify and find the content you need in your dashboard.
Both methods add content to your website. The `@c:` shortcut in the editor gives you quick access while editing, while the "Use on Website" button opens a chat interface where you can describe exactly where and how to place the content.
Currently, content management is tied to your project access. Anyone with access to your project can view and edit content pieces. Team collaboration features are being developed.
1. Your content piece will now appear on your website
2. You can edit the content anytime from the Content tab
3. Changes to content pieces will automatically update wherever they're used on your website
## Content Features
### Reusable Content
* Create content once and use it multiple times across your website
* Update content in one place and see changes reflected everywhere it's used
* Perfect for common text snippets, product descriptions, or frequently updated information
### Content Types
* **Blog Posts**: Full articles and blog content
* **Snippets**: Short reusable text pieces
* **Product Descriptions**: Detailed product information
* **About Sections**: Company or personal information
* **Custom Content**: Any text content you need to manage
### Content Management
* **Edit Content**: Modify existing content pieces from the dashboard
* **Import Content**: Upload content from text files, markdown, or Word documents
* **Content IDs**: Each piece gets a unique ID for easy referencing
* **Content Organization**: Keep your content organized with clear purposes and naming
## Best Practices
Use clear, descriptive purposes for your content pieces so you can easily find and identify them later.
Group related content pieces with similar naming conventions to keep your CMS organized.
## Use Cases
### Blog Management
Create and manage blog posts that can be easily added to blog pages or featured sections of your website.
### Product Catalogs
Maintain detailed product descriptions that can be used across product pages, listings, and promotional content.
### Marketing Copy
Store marketing headlines, descriptions, and calls-to-action that can be reused across different pages.
### Legal Content
Manage terms of service, privacy policies, and other legal content that might be referenced in multiple places.
Content pieces are available on all new\.website plans. There are no limits on the number of content pieces you can create or the length of your content.
## Troubleshooting
### Content Not Appearing
* Make sure you've saved your content changes
* Check that you've properly added the content to your website using `@c:` or the "Use on Website" button
* Refresh your website to see the latest changes
### Can't Find Content
* Check the content purpose field to identify the right piece
* Review your content list in the dashboard
* Make sure you're looking in the correct project
### Content Not Updating
* Ensure you've saved changes to the content piece
* Check that the content is properly linked on your website
* Clear your browser cache to see the latest version
## Frequently Asked Questions
The CMS is included with all new\.website plans at no additional cost. There are no limits on the number of content pieces you can create or their length.
You can import content from several file formats including plain text (.txt), markdown (.md), and Word documents (.doc, .docx). This makes it easy to migrate existing content to your CMS.
Yes, you can edit any content piece from the Content dashboard. Changes will automatically update everywhere that content is used on your website.
If you delete a content piece that's currently used on your website, those sections will show as missing content. Make sure to remove or replace the content on your website before deleting it from the CMS.
Absolutely! That's one of the main benefits of the CMS. You can use the same content piece across multiple pages, and any updates will be reflected everywhere it's used.
Use descriptive Content Purpose fields and consistent naming conventions to keep your content organized. This will help you quickly identify and find the content you need in your dashboard.
Both methods add content to your website. The `@c:` shortcut in the editor gives you quick access while editing, while the "Use on Website" button opens a chat interface where you can describe exactly where and how to place the content.
Currently, content management is tied to your project access. Anyone with access to your project can view and edit content pieces. Team collaboration features are being developed.